Refinishing your hardwood floors will ensure they withstand the test of time, protecting them from any wear and tear your family throws at them. If you’ve been putting this project off due to the price tag, you should know that redoing your floors doesn’t have to cost you a fortune.
Sanding and refinishing your hardwood floors as a DIY project is a time investment, but it is less expensive than paying a professional. Refinishing your floors yourself can cost between $500 and $1,000 depending on square footage. You can expect to pay a professional $3 to $4 per square foot to complete the same project.
“Our house is 1,200 square feet and it’s pretty much all hardwood…the quote we received was around $4,000 and we spent $600 doing the project ourselves, so we ended up saving $3,400.”
Sarah Gibson | Designer & Blogger, Room for Tuesday
Pro Tip: When refinishing your hardwood floors, you may want to consider staying somewhere else. This project can take more than three or four days. During some stages of the project, you will not be able to step on the floor for at least 24 hours.
How to Tell if Your Hardwood Floor Should Be Refinished
Before you start, determine what type of flooring you have and what state it is in.
To determine what type of wood flooring you have:
To determine if your floor needs to be refinished:
Materials and Tools Needed for Refinishing Hardwood Floors
Refinishing a floor requires several tools you probably don’t have on hand. Visit your local hardware store to rent the equipment.
Equipment to rent:
When renting the equipment, ask for a demonstration and make sure you know exactly how to work the machine before taking it out of the store.
You will also need the correct size of sandpaper and pads for each machine. What grit of sandpaper should you use to sand your hardwood floors? You will need three different levels of sandpaper to complete this project.
You will use a different grit for every pass over the floor. Depending on the state of your floors, you will want:
Additional Materials Needed for Refinishing Hardwood Floors:
| To Wear: | Dust mask | Goggles |
| Earplugs | ||
| To Prep the Room: | Plastic sheeting | Painters tape |
| Hardwood floor cleaner | Putty knife | |
| Cotton rags | Wood filler | |
| Nail set | Shop vacuum | |
| Mineral spirits | Sanding screen, 120 grit | |
| To Apply Finish: | Polyurethane floor finish | Paintbrush |
| Lamb’s-wool applicator | Paint tray |
If you are staining the floor you will also need:
Prep Your Home
Before you’re ready to refinish your hardwood floors, you must empty the room and thoroughly clean the floors.
Follow these steps to prepare your home:
“I would also recommend removing all baseboards – this step isn’t necessary, but it makes the project much easier. We’ll be adding new molding throughout the home, so it totally made sense to trash the existing baseboards prior to the floor project.”
Sarah Gibson | Designer & Blogger, Room for Tuesday
Now you’re ready to begin refinishing your hardwood floors.

Sand and Refinish Your Hardwood Floors
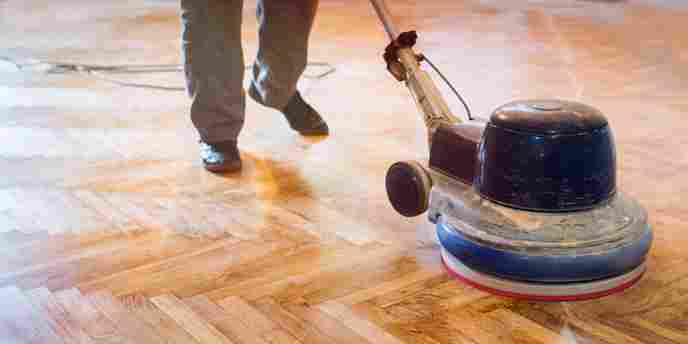
Prepare your sander by attaching the coarsest grit of sandpaper. Position your sander to go with the grain of the wood. If your floor is warped, go diagonal with the grain, but never go completely against the wood grain. Once you’re ready, follow these steps to sand your hardwood floors.
Pro tip: Wear a face mask and goggles to protect yourself from the dust and earplugs to protect your hearing.
Steps to Sand Your Hardwood Floors:
After these steps, the floor should look like smooth, untreated wood. If the floor still feels rough or lines from the sander are still visible, buff it using the sanding screen. This should remove any visible fine scratches left by the sander.
After the whole floor feels smooth, clean the room again. This time use the vacuum and a damp mop to ensure no dust is left behind.
Use a clean cotton rag to wipe the floor with mineral spirits to remove any trace of chemicals from the wood. Then, leave it to dry.

Stain Your Hardwood Floor to Change the Color
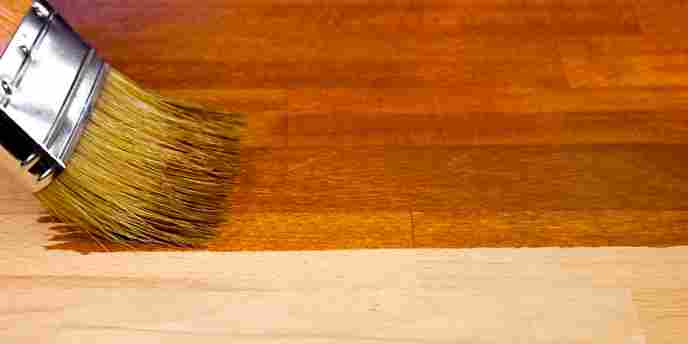
Staining is an optional step. If you’re looking for a trendy dark floor, stain is the way to go. If you want to stick with the natural color of the wood, skip this step and move on to the polyurethane finish. Staining your floor will add at least one whole day to your project time.
After selecting a color, try it out on a piece of scrap wood to ensure you like it. Then, follow the instructions on the can.
Tips for Staining Your Hardwood Floor:
“We started in the corner of each room and worked our way toward the door. After a section is complete, it’s super important to wipe and absorb all excess stain with a clean application pad! I wiped the floor five planks at a time. Don’t be fooled by the roller applicator at the home improvement store. We tried using it for one room and it did not go well. You can control the staining process much easier when done by hand! It’s neater, more even, and takes less time to dry.”
Sarah Gibson | Designer & Blogger, Room for Tuesday
Pro tip: Do not wear shoes on a recently stained floor.
Apply Finishing Coats to Hardwood Floors
This is the final and most important step when refinishing your hardwood floors. This coating seals your floors and protects them from future damage. If you stained your floors, wait until the stain is completely dry. Next, clean the floors thoroughly with a vacuum. Any dirt, dust or hair on the floor will become trapped under the finishing coat.
Polyurethane comes in both water and oil-based types. Oil-based will add a warm golden glow to your floors, but dries slower than the water-based option. Water-based polyurethane will keep the natural color of the wood and also dry faster. You must ensure the room is well-ventilated before applying either one. Wear your facemask during this step as well.
Before starting, remove any extra fuzz from the lamb’s-wool applicator. Run the vacuum over it and then use painters tape to get rid of every last piece.
Steps for Applying Finish to Hardwood Floors
Some brands of polyurethane will require sanding between coats, but others won’t. Consult the container for instructions. If you do sand between coats, be sure to clean thoroughly to get rid of all the dust.
Once you’ve completed the desired number of coats, simply wait for them to dry and then you’re done! You can begin walking on your refinished hardwood floors 24 hours after adding the final coat. Wait a week (or as long as possible) before moving furniture back into the room to prevent scratching.
Have you refinished hardwood floors before? Let us know how it went in the comments!
Completing more home improvement projects? Take a look at our Home Project Guides to learn how to budget for a kitchen remodel, efficiently declutter your home or prepare for a storm.
