
Meredith Rose’s wedding registry included something not all registries do: power tools , which she was eager to use post-wedding to turn her townhouse into a space that actually reflected her design aesthetic. “My style is pretty classic in all areas of my life so I wanted my home to feel the same way,” says Rose, who is based in Charlottesville, Virginia. “I looked to architectural features that would add character and personality — and also resale value — to our home.”
The first project on her to-do list? Transforming her blank of box of a living room into a bespoke-looking lounge with a floor-to-ceiling board-and-batten accent wall, as well as built-in shelving for showcasing favorite decorative items. “To me, both feel both classic and special, and I thought our space was perfect for them,” Rose adds.
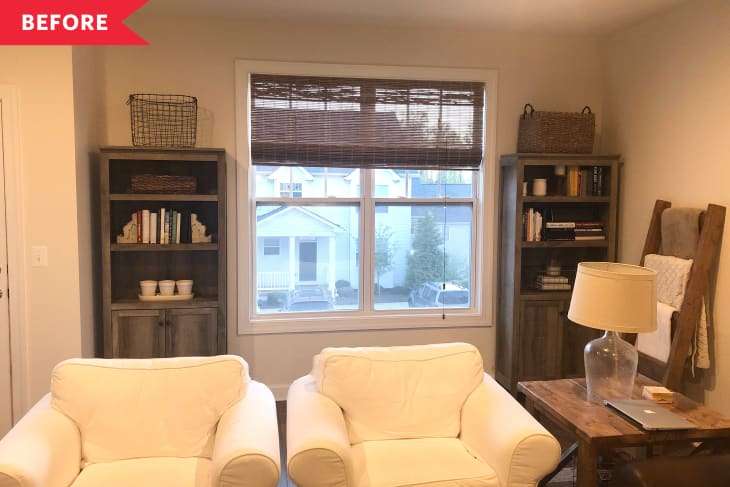
No stranger to DIY, Rose grew up assisting her father with household projects and had previously built a console table, end table, mantel, and had even constructed her own shiplap walls . “For this project in our living room, I let myself dream a little bigger,” she explains. Before beginning the construction process, Rose conducted research online, reading blogs and watching YouTube tutorials posted by individuals who had completed similar wall treatments. “I also went on Pinterest and Instagram to figure out exactly what I wanted the end result to look like,” she adds. She settled on flanking her living room window with two three-shelf bookcases with base cabinets and then essentially bisecting the living room’s main wall with board-and-batten paneling .
Once she developed that visual sense of her general goals, Rose mapped out the order in which she would build each component out on her walls before drawing up plans. “The built-ins are on either side of a window, and they are a few inches different in width, so I measured and drew what I’d need to build [them],” she notes. “I also realized I wanted cabinet doors on the bookcases that required more detailed woodworking than I was ready to do, so I decided to order those from a company online.” Rose purchased her other building materials from a local home improvement store and then got to work with her miter saw, drill, and nail gun for installation.
To construct the built-in shelving, Rose used inexpensive stock pine boards to assemble box shapes for the base of each unit. “A lot of tutorials online suggest starting with pre-made cabinets or dressers as the base,” Rose notes. However, a custom option made more sense in her own home given that the two sides of the walls beside the window were slightly uneven in size. “I wanted everything to sit flush between the wall and the window, so I built them myself, just with slightly different measurements on each side,” she explains.
Inside those cabinets, Rose added a shelf, using studs in the wall to further secure each component where possible. She then constructed the frame of the bookshelf atop those cabinet boxes. “The shelves sit on supports that I built into the sides and back wall,” she notes. “I didn’t actually add a wooden back to the bookcase; it’s just the wall!”
The next step was attaching small pine boards to the front of each piece for the face trim, which really lends the project a custom flair. Says Rose, “This is when it went from looking good to looking really good!” Lastly, Rose used wood filler and caulk on all the seams, attached the pre-fab cabinet doors and baseboards, then primed and painted both units and the back wall “with a hard finish paint that matches the trim in our home.”
Compared to the more complex shelf construction process, Rose found the board-and-batten process to be quite simple. “I think it would be a fantastic beginner DIY,” she says. After deciding where she wanted each “box” to be placed on the wall, Rose used a nail gun to secure pre-primed boards to the wall. She explains, “Technically, for traditional board-and-batten, you would cover a wall with boards and hide the seams with the battens, but my walls don’t have any texture, so I just used battens, and I think it looks great!” To finish off the setup, Rose once again grabbed her nail gun to attach cove molding to the edges of all of the boards, used wood filler and caulk to hide the seams, and then applied paint over the entire area to give it a finished look.
The project took Rose over a year to complete, but this was largely due to the pandemic. “There were certainly times when I chose to pause the project and not to go to the store to get supplies for safety reasons,” Rose says. “If I had chosen to to work on this project non-stop, it would have taken me less than half that time.”
While the living room now looks totally different and is full of architectural interest, the whole redo was fairly budget-friendly, costing roughly $1,000 in total for everything. “I chose to use cheap wood because it was all getting painted anyway,” Rose explains. “The board-and-batten cost about $300, and the built-ins cost around $700. This includes the four individual cabinet doors I ordered, which cost $65 a piece and were definitely worth it!”
Despite Rose’s previous DIY experience, this endeavor was a demanding one. “This is the largest and most challenging project I’ve ever taken on,” Rose reflects. “This was also the first time that I drew up my own plans for a project rather than following an exact tutorial by someone else. It was definitely a little nerve-racking at times because I was teaching myself everything as I went. DIY work is usually pretty forgiving though; if you mess up, you just pull that part out and try again.”
Rose also came to terms with the fact that her main living space would be a work in progress for quite some time. “I figured, when better to do that than during a pandemic, when literally no one is coming over to visit?” she says. “I just had to move a ladder out of the background of a Zoom call every now and then!”